There are many reasons to reinstall Windows: for example, your computer is infected with a virus or is so cluttered that it constantly slows down. And if it's not your hardware (and in most cases it's not), then reinstalling the operating system will return your computer to working condition. In this article we will explain how this can be done.
Warning: Before a clean installation of the system, you need to make backup copies of all your files, music, photos, videos and settings. If you don't have a second hard drive, you can save the files to . A clean install is when you completely format your hard drive and start from scratch.
It is also possible to install Windows "on top" of the existing version of the OS - the so-called "upgrade", which is a less radical way to fix problems and in which you are unlikely to lose your files and programs. But even when updating the system, we recommend that you perform a backup.
But this method has a drawback - it is likely to leave behind something that impairs the performance of the PC and will not completely get rid of viruses. This is why a clean install is preferable.
How not to lose your license
Before you begin, if you have not already done so, link your Windows 10 license key to your Mircrosoft account. If you do not do this, you may not be able to activate the system after reinstallation.
Click Start → Settings → Update and Security → Activation. If there is only the inscription “Windows system activated using a digital license,” then it is definitely not tied to a Microsoft account.
To fix this, follow the path Settings → Accounts → Your data, click Sign in with a Microsoft account instead and follow the instructions. Once the process is complete, you can check your status in the Activation section. It should now say “The system is activated using a digital license linked to your Microsoft account.”
Reinstalling Windows 10 on a working computer
If you are able to boot into Windows 10, open the Settings tab in the Start menu, and then click on Update & Security. Then click on the “Recovery” tab and use the “Restore your computer to its original state” function. This option will give you the option to choose whether or not to keep all your files and programs.


Reinstalling Windows 10 on a non-working computer
If your PC is unable to run Windows 10, try the following steps.
Look at the messages that appear before the OS logo appears. Some laptops and PCs have a “hidden” hard drive where the original copy is stored. In this case, a message like “Press F10 to launch the Recovery Wizard” usually appears.
What will this lead to? Information will be completely deleted from the hard drive, after which a hidden version of Windows will be installed on it. As a result, you will receive a PC with factory settings.
Pressing the F8 key while booting your computer will bring up the Windows boot menu, which should have a line like “Repair your computer.”
If none of the above worked


When all the preparations are done, insert the DVD into the drive and restart the computer. If everything is fine, then the PC will boot from the disk. If it boots into Windows as usual, then you will have to go to the BIOS menu (using the F2 or Del keys when booting the computer) and select the disk drive as the first device to start.

When you do this, save the changes and restart your computer again. Now it will boot from the disk and the Windows installation window will appear, in which you need to select the system language, keyboard layout, time and date format.


The next window will ask you to select an installation type. Select “Full installation” or “Custom”, which will completely clean the system and return the PC to factory settings. You can also select the update mode. It will save all the information, but will not always correct existing technical problems.


Then a window will appear asking you to select a partition on your hard drive to install Windows. Only one section available? Then just choose it. If there are several sections, then select the first main one and click “Next”.


After this, the installation process of the operating system will begin. An indicator of its progress and stages of completion will be shown below. It can take some time. It often appears that the installation is stuck at the "Complete installation" stage, but this is not the case. Be patient and don't turn off your computer.


You will eventually be taken to the profile settings menu. Here you also need to enter the license key, which was mentioned earlier and which will be needed to activate the new operating system when an Internet connection appears.


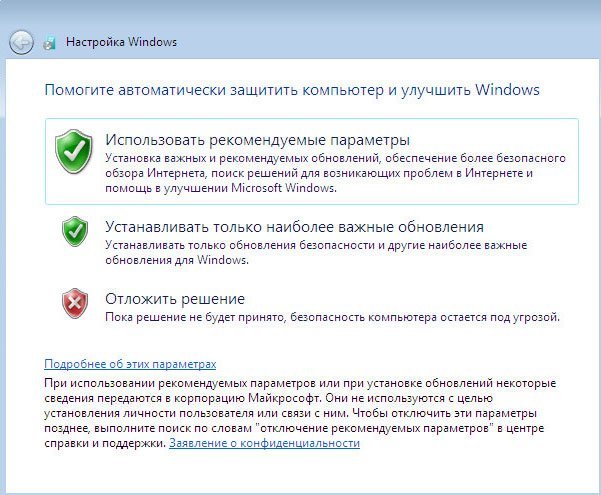
You will then be prompted to select your security settings (we recommend choosing Standard), time and date format, and connect to a wireless Internet connection, if available.


Finally you will see the Windows desktop, which, however, will look empty. Your next task will be to reinstall the various applications that you use regularly.


But that is not all! Go to Device Manager and check for drivers for all your hardware. If you see an unknown device with a question mark icon on the list, simply go to the manufacturer’s website and download the latest version of the required driver. To do this, you will need to find out the exact model name of your laptop or the names of the hardware models of your PC.


Even if the system installs its standard drivers and you do not notice any problems with the computer, you should still install the manufacturer’s original drivers on the motherboard and video card.
In addition, you may have access to special utilities (especially for laptops) that will not be restored when you reinstall Windows. For example, some laptops have utilities that prevent the battery from charging to 100%, thus extending its life.
At the very end, you can copy back all the backup copies of your files.
And accordingly, you do not have recovery points. In this case, reinstalling Windows 7 is the only way out, unless, of course, you have or do not want to restore the system from an image made, for example, using the built-in backup system. In this article we will try to describe in as much detail as possible how to install Windows 7.
You can read how to burn an image to disk using Ashampoo. The image itself can be downloaded from almost any torrent tracker. If you need original Windows 7 images, please read. You can read how to download from a torrent. Information about will also be useful.
Setting up BIOS to reinstall Windows 7
We have already covered this issue when installing Windows XP with and with . Let's not be lazy and repeat.
First, let's go into the BIOS by pressing one of the DEL, F2, F10 or Esc keys during boot. If you try these keys and nothing happens, refer to the instructions or.
At the bottom of the main window, you can (BIOS of the P8H67-V motherboard) by moving the corresponding icons to the left or to the right. Select the optical drive icon and move it to the left, in front or.
You can also configure the loading order in advanced mode on the tab Boot. In line Boot Option #1
Next, set the operating mode or to ACHI. The mode allows you to use NCQ - hardware command queuing, which in turn speeds up the operation of the drive. Go to the tab Advanced. .
The settings will be saved and the computer will restart.
Reinstalling Windows 7
Insert the burned disc with the image and reboot. The following picture will appear asking you to press any key. If booting does not occur, it means either the disk is bad, or the drive cannot read it, or the BIOS is not configured correctly. We check everything again and boot from the installation disk.
Next, you can configure or (convenient for new drives). Function Create- allows. If you are setting up a new disk, then when you create the first partition, the system will create a 100 MB service partition. It is better to choose the size of the system disk (on which you will install Windows 7) from 20 GB or more, depending on the version and bit depth of the operating system. It seems to me that for 64-bit operating systems, it is advisable to allocate 60 - 100 GB to the system partition, so that you can install the necessary programs and allocate enough space (10-15%). + space required for the swap file is 1.5RAM and for hibernation or sleep mode - 0.75RAM and it is advisable to leave at least a little for documents. 100 GB will be optimal.
If several people work at the computer, then my partitioning policy is as follows: system partition 100-200 GB (200 since they will store documents on drive C); and one general section with movies, photos and other media content, all the remaining space. Also, when creating a non-system partition, there is a format function, the use of which seems more rational than doing it in the installed system. We partition the disk according to your requirements and click Further. You can read how to partition a hard drive on an already installed Windows 7 operating system.
Conclusion
In this article we looked in detail at how it is done reinstalling windows 7 on the computer. Let's repeat the main points:
- download and
- setup for BIOS installation
- setting up the computer drive for installation
- Windows 7 installation
- driver installation
The installation process may vary slightly, but the principle is the same.
It is important to install drivers correctly so that there are no unknown devices, and only after that proceed to installing browsers, etc. If you have questions about driver removal, please look.
After installing the brand new Windows 7, you can start.
If you still have or have any questions, I will be glad to answer them in the comments.
When the computer starts to slow down and produce one error after another, and manual cleaning does not bring results, the user is left with one radical but effective solution - a complete reinstallation of Windows. And it's not as difficult as many people think. Our instructions will help you.
1. Save important data
In the process, you will format the local drive that contains the current version of Windows. Simply put, before installing a new system there, you will have to erase all old data from it. The contents of the remaining disks should remain unchanged. But it’s better to play it safe and first copy absolutely all data from your computer that you are afraid of losing to the cloud or to physical media.
If paid programs are installed on your computer, be sure to read their documentation for the rules for working with licenses when reinstalling Windows, otherwise you may lose them.
2. Create a boot disk or flash drive
If you want to install/reinstall a licensed version of Windows, make sure you have the appropriate activation key. Even if you are already using an activated system and just want to install the same version again, the old activation key may come in handy again.
- If you already have a bootable USB flash drive or disk with the version of Windows that you are going to install, you can proceed to step 3. Otherwise, you need to download a Windows image from the Internet and burn it to any of the listed media according to the instructions below.
- Decide on the version of Windows you will be installing and check that your computer meets its system requirements. This information can be found on the official Microsoft website or on the disk with your purchased Windows. Don't forget to also check that your computer supports the new version's bit depth: 32 or 64 bits. To be on the safe side, you can install a version with the same bit depth as your current version of Windows.
- To create a bootable USB flash drive with any Windows image found on the Internet, you can use the Rufus program (with UEFI support) and proceed to step 3.
And below I will tell you how to create a boot disk or flash drive with an official system image using Windows 10 as an example.
3. Boot the system from a disk or flash drive
Now that you have physical media with the desired Windows image, you need to go to the special BIOS software environment and select a disk or flash drive here as the boot source.
Perhaps instead of the classic BIOS you will see a more modern graphical interface. In addition, even in different older BIOS versions, the settings may differ. But in any case, the procedure will be approximately the same: go to the boot menu, select the desired media as the source and save the changes.
After this, the computer should boot from the selected disk or flash drive.
Friends, many letters come with the question of how to properly reinstall or update the Windows 7 operating system and what exactly is the difference between these two concepts.
Letter No. 1. Please bring clarity to a question that is confusing for many, than reinstalling Windows 7 different from the update and which is better to prefer? The operating system 7 I have installed behaves extremely unstable, it takes a long time to load, many programs have stopped installing, sometimes errors like this appear, for example, some system file or dynamic library is missing. Rolling back a significant period of time using a restore point did not help. I don’t want to reinstall again, since I have a lot of programs installed. In your comment you said that you need to restore system files, put things in order in startup, optimize Windows 7, or, as a last resort, update or reinstall Windows 7, but unfortunately I haven’t heard anything about the latter.
I would like to know, firstly:
How to actually carry out this update or reinstallation of the operating system and what will happen to my personal files on the system partition, will they be lost?
Secondly: they say that the update is launched only from a running operating system. Is it so? After all, it was possible to run an update in XP even when the system did not boot at all. Thanks in advance, Pavel.
Reinstalling Windows 7
To make everything clear to you, I will walk you through the process of updating your operating system, and then I will show you how to reinstall Windows 7 in two ways and you will see everything with your own eyes, but first I will still explain to you what an Update is and Reinstalling Windows 7.

What is a Windows 7 update?
This is installing a system on top of the old one, that is, you insert a disk with the Windows 7 distribution and start installing the system directly in the running 7, but in the installation menu you select not a full installation, but an update. What does it give?
First of all, damaged system files will be replaced, working system files will not be replaced, nothing will happen to your personal data: installed applications, documents, music, all your programs will run and your entire household on all disks will remain untouched. Also, user accounts will be transferred without changes; all this will be done by the Windows Easy Transfer tool (very important files, it is still better to transfer them manually). I also want to say that you will have to re-enter the product key, select the language, region, set the time, and so on. Warning. If you have a counterfeit Windows 7, after upgrading you will have a window in the lower right corner of your desktop warning you that your copy of Windows is not genuine.
- They also often ask how the Data Transfer Tool works? When updating Windows 7, temporary folders of your data will be created containing information about user accounts and settings, your email, files in the Favorites folder, personal files and user folders - music, images, videos, as well as parameters of installed programs . Once your system is updated, all data will return to its place, and temporary folders will be deleted. When upgrading, the data transfer tool does not allow the user to select files to transfer, but when reinstalling, you can select what you want to transfer (details below).
Will the update solve all your problems related to Windows 7? In most cases, Yes, but unfortunately no one can guarantee a 100% result here. In my opinion, if possible, it is better to delete and reformat the partition with a poorly functioning operating system, having first transferred all important files to other hard drive volumes or a portable USB drive and reinstall the system with all programs.
- Note: Windows XP has the same update mechanism and it can be launched both in a running operating system, and in cases where you cannot log into Windows XP due to problems, then you can boot from the XP installation disk and select setup menu option, . Please be aware that in Windows 7, unfortunately, there is no such option and the update can only be carried out in a running operating system.
What is reinstalling Windows 7?
Reinstallation is a complete replacement of all operating system files, that is, formatting a partition with an unstable system and installing Windows 7 again. Naturally, all your files and the system itself will be deleted from the drive (C:). In order to transfer all your files from the system drive (C:), you will need to use Windows Easy Transfer, but it will no longer work automatically, as in the case of an update, but we will use it ourselves and we will also choose what we need to transfer from the old system to the new one ourselves.
- Now this begs the question: What is the difference between reinstalling the system and installing it again? Friends are just here. When reinstalling Windows 7, you can use File Transfer Tool if you wish, since you already had the system installed once, but when simply installing the system again, install the system on the partition you created on the new hard drive. In short, here it is, I don’t know how to explain it more clearly!
What can I say, let's first update my Windows 7 together, and at the end of the article we will reinstall the system using the file transfer tool, it has also been working with errors for me lately and you will see with your own eyes, and then select what you need.
Windows 7 update
We insert the installation disk with Windows 7 into the drive; if you do not have autorun, click setup.exe.

Before updating, we can connect to the internet and download the latest updates from the official Microsoft website
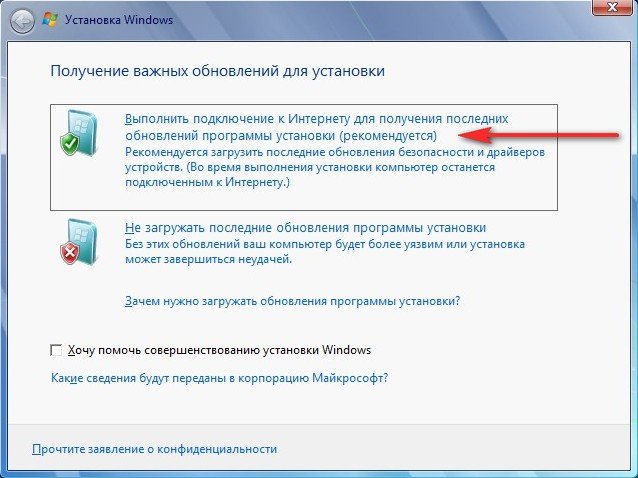
Select Update

Compatibility check

Copy Windows files

Collecting files, settings, and programs, Unpacking Windows files, Installing features and updates, Transferring settings and program files


The computer restarts.
At this point you need to boot from the hard drive, and not a bootable USB flash drive or boot disk with Win 7.
Updating Registry Settings

Enter the key

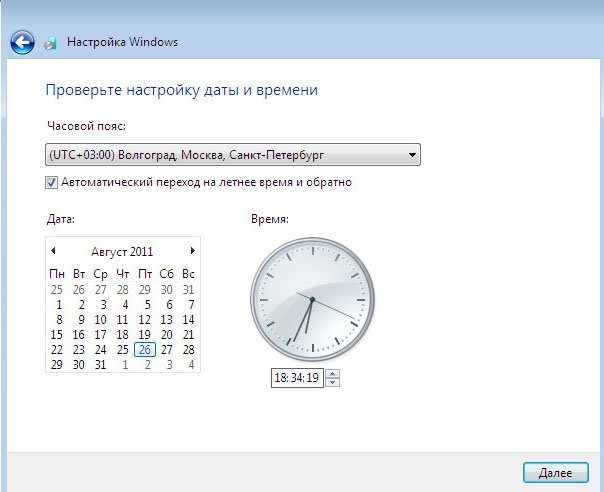
Setting the time
The update process is completed, the accounts are saved
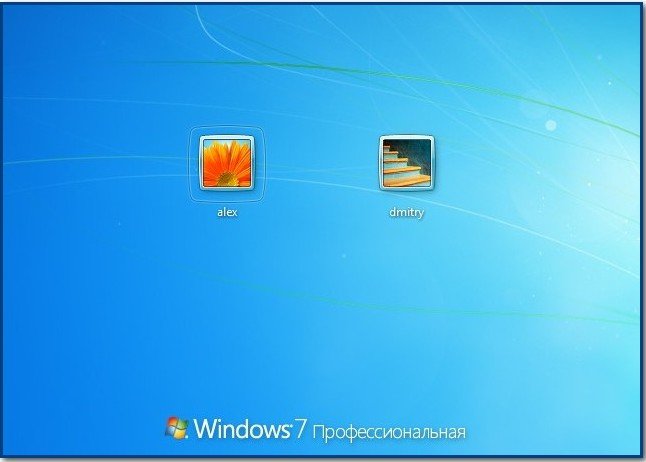
All my files are in place, all programs run.

Reinstalling Windows 7
Now let's find out what Reinstalling Windows 7 is. According to the rules, we will reinstall Windows 7 on the same disk on which the old operating system is installed. If Windows was previously installed, for example, on the (C:) partition, then you need to reinstall it on the (C:) partition and not on any other partition (otherwise this will be the installation of a second operating system). All your files on the partition (C:) will be replaced with files from the newly installed Windows 7 operating system.
- First of all, we will launch the Data Transfer Tool, which will copy all our personal data from the Windows 7 partition to portable media or another hard drive partition, then we will boot from the Windows 7 installation disk (how to install it in) and install the system again. Immediately after installing Windows 7, let's launch Data Transfer Tool and copy all our files back, as a result we will get a new operating system and all our data: music, documents, personal folders, and so on.
- Note: You may ask: Is it possible to start installing a new system directly from a running Windows 7 and not go into the BIOS. Answer: This method is given at the end and we will also consider it.
Let's now see what the Data Transfer Tool will transfer from our files, let's launch it.
Start, write in the input field Data Transfer Tool
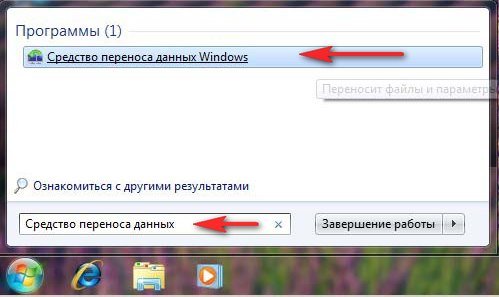
In this window we see detailed information about which files we can transfer from the old operating system to the new one, we will now select.

The data transfer tool suggests us to use:
- Data transfer cable - a cable specially designed for this purpose, which still needs to be purchased, is used to transfer files between two computers; in principle, we do not need this, because we have one computer.
- Network – transferring files over the network is also not our option.
- External drive or USB flash memory device. What we need. If you don't have much data, you can even use an 8GB or 16GB flash drive. By the way, if you don’t have a flash drive or a portable USB drive, you can use another partition of your hard drive for storage, like I did for example.
So you selected an External drive or USB flash memory device, and I selected a partition on the hard drive (D:).

We select This is my source computer, that is, the data needs to be transferred from it.

Data that can be transferred to the new system is analyzed at Usernames and General elements, click Settings, and also if you click Advanced, a full picture of what the Data Transfer Tool will include in the archive will open.

Please note that the archive includes the folders of both operating system users and personal data, this is correct. But we definitely don’t need to transfer data located on all partitions of the hard drive except the system one (C:), since we will be reinstalling Windows 7 located on (C:) and the reinstallation process in our case will only affect the system partition ( WITH:). Uncheck all hard drives.


However, if you decide to transfer data from all partitions, you can leave the checkbox unchecked, just keep in mind that the data transfer file in this case will occupy a very large volume..
What else should not be included in the archive that the data migration tool will create? For example, you may not include the C:\Program Files folder; it would be safer to install all programs again after reinstalling Windows 7.
So click Save, you can assign a password


The file transfer process is in progress. A transfer file with the extension (MIG) is created on disk (D:)


Now it’s time to reinstall Windows 7, insert the installation disk with the seven into the drive and reboot, at the beginning of the installation it’s better to click on the Disk Setup button and select Format partition with the previous Windows 7, and in general the whole process step by step, starting from changing the boot device priority in the BIOS and before installing the operating system itself, described in our article.
I think you’ve done it and installed the system, now let’s use our Data Transfer Tool again.

Select This is my new computer (you need to transfer files and settings to this computer)

Your external hard drive with the data transfer file should already be connected.
I, in turn, indicate the hard drive partition (D:), the transfer file is located there.


We can click Settings and select files to transfer to the new system manually, as we have already done, or simply click Transfer.

The transfer is complete, we can look at the report and also make sure that all your files have been transferred to the new system.
If the performance of your computer has decreased or something in its operation has ceased to suit you, then reinstalling Windows can be a solution to this problem. For many, the very idea of reinstalling the system may sound somewhat scary, but in reality there is nothing difficult about it. This guide will help you through this process.
We will tell you how to reinstall on Windows 10, Windows 8 and Windows 7.
Important warning: If you decide to do a “clean install” (installing the system on a hard drive from which all files have been previously deleted), then before doing this you need to create a backup copy of all your files, music, photos and videos, as well as save settings and applications .
In addition, it is also possible to reinstall Windows “on top” of an existing system. Although, in this case, it will most likely be about an update, during which you will not have to part with your files and applications. However, it is worth considering that this method is still less effective in combating problems that interfere with the loading and operation of the system, since such a reinstallation may retain residual virus files. Also keep in mind that Windows 8 has Refresh and Reset functions that can also be useful.
How to reinstall Windows 10?
Before you begin the reinstallation, you'll need to link your Windows 10 product key to your Microsoft account if you haven't already done so. Otherwise, after reinstalling, you may have problems reactivating Windows 10. This system does not always have a license key, and if you upgraded from Windows 7 or 8, then your system will definitely not have one.
So go to Settings > Update & Security > Activation. If in this section you only see the words “Windows system is activated with a digital license” and nothing else, then your system is not linked to a Microsoft account. To fix this, go to Settings > Accounts > Your data. Select "Sign in with a Microsoft Account" and follow the further prompts. If you did everything correctly, then in the “Activation” section the status will be changed to “The Windows system is activated using a digital license linked to your Microsoft account.”
Reinstalling Windows 10 on a working computer
If you can log into Windows 10, then select the Settings tab from the Start menu, and then go to Update & Security. In the “Recovery” section, find the “Reset your computer to its original state” option - with its help you can save or delete personal files, and then reinstall the system.
In addition, just lower in this section you will find the “Advanced recovery options” option, which will help you perform a clean installation of Windows.

Reinstalling Windows 10 on a non-working computer
If you are unable to sign in, follow these steps.
First, turn on your computer and wait for any message before the system logo appears. Some laptops and computers come with a "hidden" hard drive that stores a full Windows backup. Typically, this will look like a message like “Press F10 to use recovery options.” Every computer is different, but there is always an option to restore the system to factory settings. With its help, you can delete all data from your hard drive, and then transfer the hidden version of Windows back to the hard drive - in this case, your computer will return to its original state.
You can also press F8 several times to open the Advanced Boot Options menu.
If none of these methods help, try the following:
1. Download Microsoft's Media Creation Tool, which will create a bootable disk or flash drive with Windows 10. To do this, you will need to use a working computer if yours is not logged into the system. This disc can also be used for reinstallation, so save it for future use. Additionally, you can use this disk to upgrade your existing system by simply starting your Windows 7 or 8 system and opening the Setup.exe file saved on the disk.
2. Connect the USB device to your computer and turn it on. However, before you do this, make sure that you have created a backup copy of your files, since this operation will erase all data from the C drive. If you did not take care of this in advance, then you will need to remove the hard drive and connect it to a working device, after Why create a copy of the files stored on it.
3. If the computer does not boot from a USB device, go to the BIOS settings: to do this, immediately after turning on the computer, press Delete or F2, then find the item regarding boot order in the parameters and set your USB device as the preferred one for boot .
4. Once your computer boots from your installation media, you will see the Windows icon, followed by a screen where you can select your system language. Just follow the further instructions. Particular attention should be paid to selecting the correct hard drive for installing the system. If this is a new disk, it will be completely empty.

Once the installation begins, your computer will restart. You'll see a Windows icon and a large circle-shaped progress bar. Watch the installation process carefully as your computer will restart several times and at some point may ask you to remove your boot device.

How to reinstall Windows 7?
Below are instructions on how to reinstall Windows 7 using DVD. However, the system on some PCs can be reinstalled using Disk and Partition Recovery. To do this, simply follow the manufacturer's instructions.
If you are reinstalling Windows on the same hard drive where it was previously installed, then you have two options: Upgrade and Clean Install. The first option will save all your files, but may not solve existing problems. The second option will wipe everything off your hard drive and you'll lose all your data, so back up everything you don't want to lose.
Also, don't forget that after installation you will need to activate Windows using your product key (5 groups of 5 characters after "CD Key"), so make sure you can find it stuck somewhere on your computer. If you do not have such a sticker or the symbols on it are impossible to make out, you can recognize it using the Magical Jelly Bean Keyfinder program.

Having dealt with all this, turn off your computer, insert the Windows disk and boot it. Ideally, the system should boot using it. If the system boots in its normal mode, then you will need to go to the BIOS menu and in the settings, note that you want the computer to boot from the disk.

Once you have booted your computer using the boot disk, Windows installation will begin. On the first screen, you will need to select the language to install, the time and currency format, as well as the keyboard layout.

After this, the system will prompt you to select the installation type from the two offered. If you select "Full installation (advanced options)", you will completely reinstall the system. You can also try Upgrade to install Windows on top of your existing system. In this case, all your files, programs and settings will remain intact. However, as mentioned earlier, we will select and perform a “clean installation”.

After this, the system will specify where exactly you want to install Windows. Sometimes the system shows only one drive, in which case you just have to select “Next”. If you are offered several disks, then select the one that comes first in the list (as a rule, it has the largest amount of memory) and click “Next”.

After this, the installation of Windows 7 will begin. To show progress, you will be presented with a list of actions, thanks to which you can monitor the progress of the work. Installation may take some time. Usually the longest time is “Complete installation”, so be patient and do not turn off your computer.

Finally, you will be redirected to enter your account details. In addition, you will need to activate the system using the license key that you entered earlier. This can be done a little later, as soon as you connect to the Internet.

Next, you will need to select your computer's security settings (we recommend selecting "Use recommended settings"), set the date and time, and also configure the network type by selecting "Home Network".

The system will now be accessible, but the desktop will look slightly different as it is completely empty. Therefore, the next thing you need to do is reinstall the applications you need.

Go to Task Manager (found in the Start menu) and check that all drivers are installed correctly. If you see a red exclamation mark next to any device, go to the vendor's website and download the latest version that is suitable for your computer. To do this, you need to know the make and model of the motherboard, as well as the models of other critical components, such as the video card.

Even if you see that the system shows no problems, then for components such as a video card, motherboard chipset or laptop touchpad, instead of the standard drivers installed by Windows, it is better to install special drivers from the manufacturer.
In addition, the manufacturer may have utilities specifically for laptops that are not reinstalled during a clean installation of Windows. For example, for some laptops there are special utilities that do not allow the battery to be charged to 100%, thereby extending its life.


