Tired of looking around in vain attempts to understand where they are shooting from?
Do you want to be prepared in advance for where the enemy will come from and see him from afar?
Then this mod is for you!
The mod adds: the ability to turn on the illumination of the corpses of defeated enemies, including with a particle effect, which can be seen from a very long distance and even through textures. This will make your task of finding the corpse much easier. Moreover, a completely looted corpse will stop glowing and will not distract your attention.
the ability to turn on the illumination of enemies in one of the 9 proposed colors and see your enemies from afar;
the ability to enable a fix for the built-in in-game highlighting of targets when the “Targeting HUD” modification is installed in the Power Armor helmet. This fix will eliminate the highlighting of friendly NPCs, only hostile characters will be highlighted. Separately, a fix for armor can be obtained here.
The backlight can be one of these colors:
red
green
blue
yellow
violet
purple
pink
dark green
blue
No additional equipment is required, but all these options only work with the Scrapper talent taken, level 1 is enough.
Update 1.1:
1. Fixed an issue where some corpses continued to glow even without loot inside (for example, Death Claws).
2. Fixed a problem with displaying particles. The particles have been reworked and the color has been changed to a less vibrant color.
3. Added colors:
dark green,
blue.
4. The texture for the backlight has been changed, now it is smoother.
5. Corpses with keys or passwords will now always glow until you remove the key or password from them.
6. An addon has been added, when installed, corpses will not glow if they only contain armor that the player no longer needs in the midgame, namely:
- Leather armor and its modifications,
- Raider armor and its modifications,
- Super Mutant Armor
- Fabric items.
- Initial masks, helmets, goggles, etc.
- Dryn (weapon of super mutants)
There are conflicts with this addon, see Conflicts.
7. Added an installation option in which corpses will be highlighted only when a weapon is drawn out (you can remove a weapon by holding down the "R" key for a long time).
Update 1.2:
Fixed problem with Russian localization.
Installation:
If you are installing a mod for Fallout 4 for the first time, you will first need to make a few settings for the game so that it loads mods and additional media files. For information on how to do this, read the article How to install mods for Fallout 4
It is better to install using Nexus Mod Manager, because... The mod is specially configured for this installation.
You can also install manually:
1. From the core folder, select the folder with the settings you need and copy the file “file_name”.esp from the desired folder to the game folder Data: Both - highlighting both corpses and enemies
Corpses Only - highlighting only corpses
Always - always highlight corpses
WhenWeaponOut - highlight corpses only when weapons are drawn
Enemies Only - highlighting only enemies2. From the media folder, copy the textures directory to the game Data folder
3. Depending on whether you want particles to be displayed or not, copy the meshes folder and all its contents from the folder named below to the game folder Data: with particles - display particles
without particles - DO NOT display particles4. From the addons folder, copy the file "file_name".esp from the desired subfolder to the game folder Data:Plus_Visor_Fix - fix for built-in in-game highlighting of targets
Exceptions - do not highlight corpses if they contain only armor that the player no longer needs in the midgame, namely: leather armor and its modifications, raider armor and its modifications, super mutant armor, fabric items, initial masks, helmets, goggles, etc. .d., drin (weapon of super mutants).5. If desired, select the desired color from the colors folder and replace the file from the textures\spc\Highlight_Enemy.dds or textures\spc\Highlight_Corpse.dds folder with this file without changing the name. The names should remain Highlight_Enemy.dds and Highlight_Corpse.dds
6. Open C:\Users\%USER%\AppData\Local\Fallout4\plugins.txt
Add lines with copied file names "filename.esp" without quotes
Save plugins.txt.
Removal:
Delete the Corpses_and_Enemies_Highlighting.esp file from the Data folder, as well as Corpse_Highlight_Exceptions.esp and Visor_Fix.esp, if present.
Remove spc directories from Data/textures and Data/meshes folders.
Remove lines with names of deleted files with extension .esp from C:\Users\%USER%\AppData\Local\Fallout4\plugins.txt.
Conflicts:
Conflicts are possible when using the addon to exclude the highlighting of the initial armor. Conflicts are possible with mods that change the starting armor, such as the Armorsmith Extended mod. Either don't use my addon, or put it higher in the loadorder, but correct operation is not guaranteed.
P.S. I took into account all your comments about attaching effects to armor (glasses, modifications, etc.) and tried very hard to bring them to life, but, unfortunately, after many hours of work I was still unable to overcome the bugs of the game. Thanks to Bethesda for a crude and buggy product. As a result, until a normal tool for creating mods comes out, I don’t plan any more changes, the mod will remain as it is. If you think it doesn't fit the game's lore or isn't balanced enough, well, that's your right.
Tired of looking for the boss’s corpse that has fallen somewhere after a hot shootout?Tired of looking around in vain attempts to understand where they are shooting from?
Do you want to be prepared in advance for where the enemy will come from and see him from afar?
Then this mod is for you!
Mod adds:
the ability to turn on the illumination of the corpses of defeated enemies, including with a particle effect, which can be seen from a very long distance and even through textures. This will make your task of finding the corpse much easier. Moreover, a completely looted corpse will stop glowing and will not distract your attention.
the ability to turn on the illumination of enemies and see them from afar;
the ability to enable a fix for the built-in in-game highlighting of targets when the “Targeting HUD” modification is installed in the Power Armor helmet. This fix will eliminate the highlighting of friendly NPCs, only hostile characters will be highlighted.
No additional equipment is required, but
All these options only work if you have the Scrapper talent, level 1 is enough.
The backlight can be one of these colors:
red
green
blue
yellow
violet
purple
pink
No additional equipment is required, but all these options only work with the Scrapper talent taken, level 1 is enough.
Update 1.1:
1. Fixed an issue where some corpses continued to glow even without loot inside (for example, Death Claws).
2. Fixed a problem with displaying particles. The particles have been reworked and the color has been changed to a less vibrant color.
3. Added colors:
dark green,
blue.
4. The texture for the backlight has been changed, now it is smoother.
5. Corpses with keys or passwords will now always glow until you remove the key or password from them.
6. An addon has been added, when installed, corpses will not glow if they only contain armor that the player no longer needs in the midgame, namely:
- Leather armor and its modifications,
- Raider armor and its modifications,
- Super Mutant Armor
- Fabric items.
- Initial masks, helmets, goggles, etc.
- Dryn (weapon of super mutants)
There are conflicts with this addon, see Conflicts.
7. Added an installation option in which corpses will be highlighted only when a weapon is drawn out (you can remove a weapon by holding down the "R" key for a long time).
Update 1.2:
Fixed problem with Russian localization.
Installation:
It is better to install using Nexus Mod Manager, because... The mod is specially configured for this installation.
You can also install manually:
1. From the core folder, select the folder with the settings you need and copy the Corpses_and_Enemies_Highlighting.esp file from the desired folder to the game data folder:
Both - highlighting corpses and enemies
Plus_Visor_Fix - highlighting of corpses and enemies plus a fix for the built-in in-game highlighting of targets
Corpses - highlighting corpses
Enemies - highlighting enemies
2. From the media folder, copy the textures directory to the game Data folder
3. Depending on whether you want particles to be displayed or not, copy the meshes folder and all its contents from the folder named below to the game Data folder:
with particles - display particles
without particles - DO NOT display particles
4. If desired, select the desired color from the colors folder and replace the file from the textures\spc\Highlight_Enemy.dds or textures\spc\Highlight_Corpse.dds folder with this file without changing the name. The names should remain Highlight_Enemy.dds and Highlight_Corpse.dds
5. Open C:\Users\%USER%\AppData\Local\Fallout4\plugins.txt
Add the line "Corpses_and_Enemies_Highlighting.esp" without quotes
Save plugins.txt
Removal:
Delete the file Corpses_and_Enemies_Highlighting.esp from the Data folder
Remove spc directories from Data/textures and Data/meshes folders
Remove the line "Corpses_and_Enemies_Highlighting.esp" from C:\Users\%USER%\AppData\Local\Fallout4\plugins.txt
Solution
So, let's begin:
1) Go into the game, go into construction mode, call the console (Y/~ button)
2) Type TCL
3) For example, we have a wall, and we want to attach another one to it, but without a collision, i.e. as tightly as possible. We select the wall to which we want to attach, press E, then press TAB, but now this object cannot be selected, BUT now whatever you want to attach, everything will do.
Remember that all these goodies work in collision disabled mode, i.e. TCL
To make it as clear as possible, I recorded a video in which I clearly show everything.
This works not only with walls, but also with all other objects.
This way, everyone can build what they want, for example, without conflict, you can easily install a bar, hospital or any store indoors.
Also check out my other guide, which will allow you to remove the construction limit in settlements
Endless Settlers
It may turn out that you need settlers, for example, to populate a newly opened settlement. This cheat will help you add a fixed number of settlers, and also changes the standard maximum from 17-20 people to 99. This is done by increasing charisma to 99.
So, let's begin:
1) Download this archive, throw the contents into the Fallout 4 folder
2) We go into the game, go into the settlement.
3) Open the console and enter the following commands
a) bat settler - adds one settler.
b) bat settlers - adds a group of settlers, 3-4 people.
c) bat moresettlers - adds a large group of settlers, 5-6 people.
4) To settle a summoned settler in a particular place, go to the construction menu, point at the dude, press R, select the settlement.
Until you settle a person, he is of no use.
5) Optional: Not everyone will like the fact that Charisma will have a value of 99.
Therefore, after each time you call settlers through the console, enter Player.Setav Charisma in the console<Нужное число от 1 до 10>.
Do not be afraid, after the return of the original Charisma, the settlers from your village will not run away.
Essentially, if you had Charisma 10, and it became 99, then this will only affect the number of settlers.
Do not overdo it with the number of settlers, otherwise the game will sag.
Removing corpses
It's not very pleasant for settlers to sleep in the same room with a dead ghoul, is it?
To remove a corpse, open the console, click on the corpse, enter Disable, that’s it.
The corpse is not deleted, it becomes invisible, so that it becomes visible again, you can also enter Enable, but you are unlikely to find the corpse.
You can also delete using the MarkForDelete command, but you can delete the texture by mistake, so do it at your own peril and risk.
Disable masks and slightly clogs the saves, MarkForDelete removes the object from the game altogether.
There is a very good mod that also allows you to build objects without collision + removes collision on standard game objects (destroyed houses in Sanctuary for example)
Step 1: General Mod Installation
If you have already done this, then go straight to Step 2.
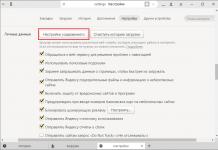
a) Find the document Fallout4Prefs.ini
b) Open the document, find the line (If there is no line, create it)
c) Directly below it enter bEnableFileSelection=1
d) Save and close.
e) Now open the document Fallout4.ini
e) Find the line sResourceDataDirsFinal=STRINGS\
f) Replace it with sResourceDataDirsFinal=STRINGS\, TEXTURES\, MUSIC\, SOUND\, INTERFACE\, MESHES\, PROGRAMS\, MATERIALS\, LODSETTINGS\, VIS\, MISC\, SCRIPTS\, SHADERSFX\
g) Save.
h) Done, now move on to Step 2.
If the document is not saved, then uncheck the “Read only” checkbox in the properties!
b) Extract it to the Fallout4/Data folder.
c) Download Nexus Mod Manager and install.
In the launcher, check the box next to "Simple Intersection"


